Say Goodbye to Dry, Flavorless Turkey: Embrace the Dry Brine Revolution
The quest for the perfect Thanksgiving or holiday turkey often feels like an insurmountable challenge. Tales of dry, uninspiring meat and soggy, bland skin are all too common, leaving hosts feeling defeated. Many home cooks have turned to complicated liquid brines, wrestling with buckets of salty water and battling a compromised meat texture. But what if there was a simpler, more effective way to achieve a bird that is not only incredibly moist and tender but also boasts gloriously crisp, golden skin and deep, savory flavor throughout? Enter the **dry brined turkey** – a technique lauded by culinary experts and home chefs alike as the ultimate secret to a truly unforgettable centerpiece. This foolproof method, perfected by pioneers like Judy Rodgers of San Francisco's Zuni Café for her chickens, has revolutionized turkey preparation. It strips away the fuss and mess of traditional brining, leaving you with nothing but pure, unadulterated turkey perfection. If you're ready to banish dry turkey from your table forever and genuinely excite your guests, read on to discover why dry brining is the only method you'll ever need.The Culinary Secret Unveiled: How Dry Brining Transforms Your Turkey
At its heart, dry brining is remarkably simple: it’s just salt and time. But the magic that unfolds during this seemingly modest process is nothing short of culinary alchemy. Unlike a liquid brine, which involves submerging your turkey in a salty solution, a dry brine requires only a generous application of salt (often mixed with your favorite herbs and spices) directly onto the turkey's skin. This method offers a myriad of benefits that directly address the most common turkey woes:- Unrivaled Juiciness: The salt initially draws moisture out of the turkey's cells through osmosis. This moisture then mixes with the salt, creating a highly concentrated brine. Over time, this salty liquid is reabsorbed back into the meat, carrying the seasoning deep within. This process changes the protein structure, allowing the meat to retain more moisture during cooking, resulting in an exceptionally juicy and tender **dry brined turkey**.
- Crisp, Golden Skin: One of the most significant advantages of dry brining is its effect on the skin. By drawing out moisture and allowing the turkey to air-dry in the refrigerator, the skin becomes significantly drier. This dehydration is crucial for achieving that coveted, shattering-crisp, golden-brown skin that is so often elusive with other methods. No more flabby, pale skin!
- Deep, Even Flavor: Because the salt penetrates the meat from the inside out, every bite of your turkey will be perfectly seasoned, not just the surface. This deep infusion of flavor is a stark contrast to liquid brines, which can sometimes only flavor the outermost layers and even lead to a "hammy" texture.
- Reduced Prep Day Stress: With a **dry brined turkey**, much of the preparation happens days in advance. This frees up precious time on the actual cooking day, allowing you to focus on other dishes, enjoy your guests, and walk into the kitchen feeling calm and prepared.
Your Foolproof Guide: Mastering the Art of Dry Brined Turkey
The beauty of the dry brine technique lies in its simplicity, but a few key steps and considerations will ensure your success. Forget complicated basting schedules or fussy soaking; all you need is salt, spices, and patience.Step 1: The Right Tools and Ingredients
- The Turkey: Start with a thawed turkey. If it's frozen, allow ample time for it to fully defrost in the refrigerator (about 24 hours per 4-5 pounds). Avoid pre-brined or Kosher turkeys, as they already contain salt, and adding more could make them overly salty.
- Salt: Use coarse salt like Kosher salt (Diamond Crystal or Morton's are common). The larger granules are easier to handle and adhere better to the skin. Fine table salt is too potent and can easily oversalt your bird.
- Spices & Herbs: This is where you can personalize your flavor profile. Classic additions include freshly ground black pepper, garlic powder, onion powder, smoked paprika, and dried herbs like rosemary, sage, and thyme. Mix these with your salt.
- A Sturdy Pan and Rack: You'll need a rimmed baking sheet with a wire rack to allow for air circulation during the brining period.
Step 2: Preparing and Salting Your Turkey
- Pat Dry: Remove the turkey from its packaging, remove the giblets and neck from the cavity, and pat it thoroughly dry with paper towels, inside and out. This step is critical for the salt to adhere and for achieving crisp skin later.
- Season Liberally: For every 5 pounds of turkey, a good starting point is about 1 tablespoon of Kosher salt (adjust slightly based on your salt preference and specific salt brand). Mix this with your chosen spices. Sprinkle about two-thirds of the salt mixture evenly over the entire exterior of the turkey, paying special attention to the breast, thighs, and legs. For maximum flavor penetration, gently separate the skin from the breast meat and rub some of the salt mixture directly onto the meat itself. Then, sprinkle the remaining salt mixture into the cavity.
- Position on Rack: Place the seasoned turkey, breast-side up, on a wire rack set over a rimmed baking sheet. This setup ensures even air circulation around the bird.
Step 3: The Brining Period – Patience is Key
Transfer the turkey, uncovered, to your refrigerator. This "hang time" is essential for the magic to happen. The cold, dry air of the fridge works in tandem with the salt to draw out moisture from the skin, setting the stage for unparalleled crispness. Allow at least 24 hours, but ideally 48 to 72 hours, for a truly profound flavor and texture transformation. For a large bird (over 15 lbs), leaning towards 72 hours is recommended.
- Why Uncovered? Leaving the turkey uncovered allows the skin to dry out effectively, which is key for crispness.
- No Rinsing: Do NOT rinse the turkey before roasting. This would wash away the carefully applied seasoning and add unwanted moisture back to the skin.
For a detailed, step-by-step recipe, including precise measurements and ingredient suggestions, explore our guide: Easy Dry Brine Turkey Recipe for Perfectly Golden, Moist Meat.
From Brine to Bountiful Feast: Roasting, Resting, and Serving Perfection
After patiently dry brining your turkey, the final steps before carving are equally important for a magnificent outcome.Pre-Roast Preparation
On roasting day, remove the turkey from the refrigerator about 1-2 hours before you plan to cook it. This allows it to come closer to room temperature, promoting more even cooking. You'll notice the skin looks noticeably dry and taut – that's a sign of success!
- No Basting Needed: Because the dry brine keeps the meat so moist and the skin so crisp, basting becomes entirely unnecessary. In fact, opening the oven repeatedly to baste only cools it down and extends cooking time.
Roasting for Perfection
The roasting method itself is fairly straightforward. High heat at the beginning can help crisp the skin, followed by a lower temperature to ensure the meat cooks through gently.
- Temperature Control: Roast at a high temperature (e.g., 425°F/220°C) for the first 30-45 minutes to get a good crisp on the skin, then reduce to a lower temperature (e.g., 325°F/160°C) for the remainder of the cooking time.
- Use a Thermometer: The only reliable way to know your turkey is done is with a meat thermometer. Insert it into the thickest part of the thigh, avoiding the bone. The turkey is ready when it reaches 165°F (74°C).
The Essential Rest
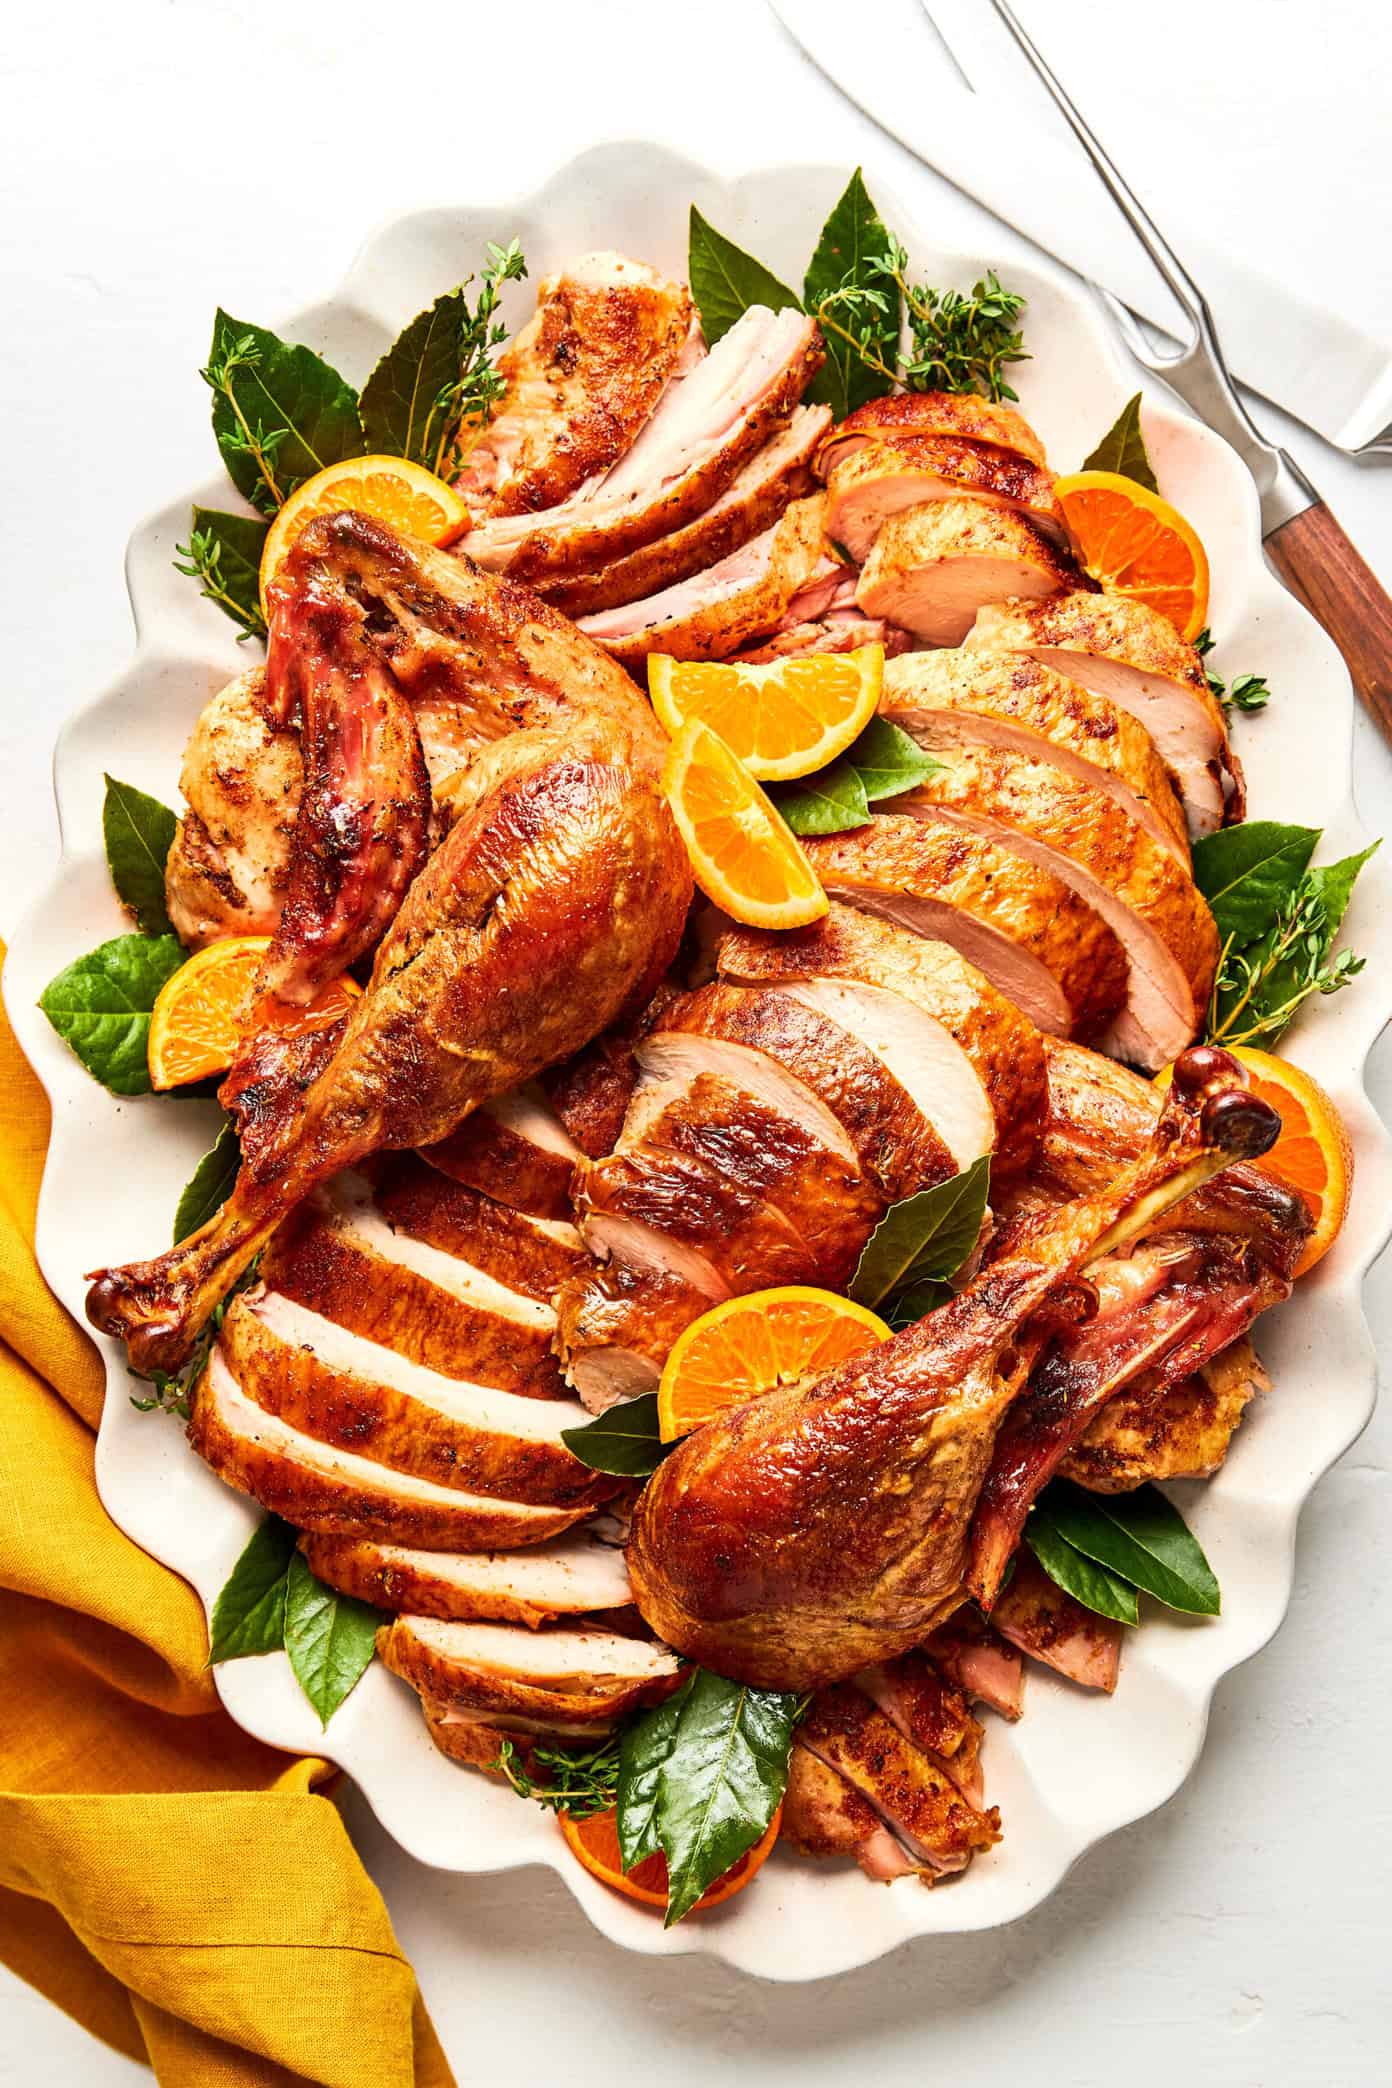
Once your **dry brined turkey** reaches temperature, remove it from the oven, tent it loosely with foil, and let it rest for at least 30 minutes, or even up to an hour for larger birds. This resting period is non-negotiable! It allows the juices to redistribute throughout the meat, ensuring every slice is incredibly moist. Carving too soon will result in juices flowing onto your cutting board, leaving you with a drier turkey.
Feast-Ready: Carving and Crafting the Perfect Gravy
With your perfectly roasted and rested **dry brined turkey** ready, the final flourish is a confident carving and a rich, flavorful gravy made from the pan drippings.Expert Carving for Maximum Juiciness
Carving can feel daunting, but a sharp knife and a bit of practice make it simple. Start by removing the legs and thighs, then separate the drumsticks from the thighs. Next, slice the breast meat horizontally off the bone. Presenting neatly carved slices enhances the dining experience and showcases the moist interior you've worked so hard to achieve.
Gravy from Gold
The pan drippings from a dry brined turkey are liquid gold. They are concentrated with rich, savory flavor from the turkey and the seasonings, without the excessive dilution from a liquid brine. Simply deglaze your roasting pan with a splash of broth or wine, then strain the drippings, thicken with a roux or cornstarch slurry, and season to taste. If you prefer to prepare gravy ahead of time or want a complementary option, a robust mushroom gravy also makes a fantastic accompaniment.
