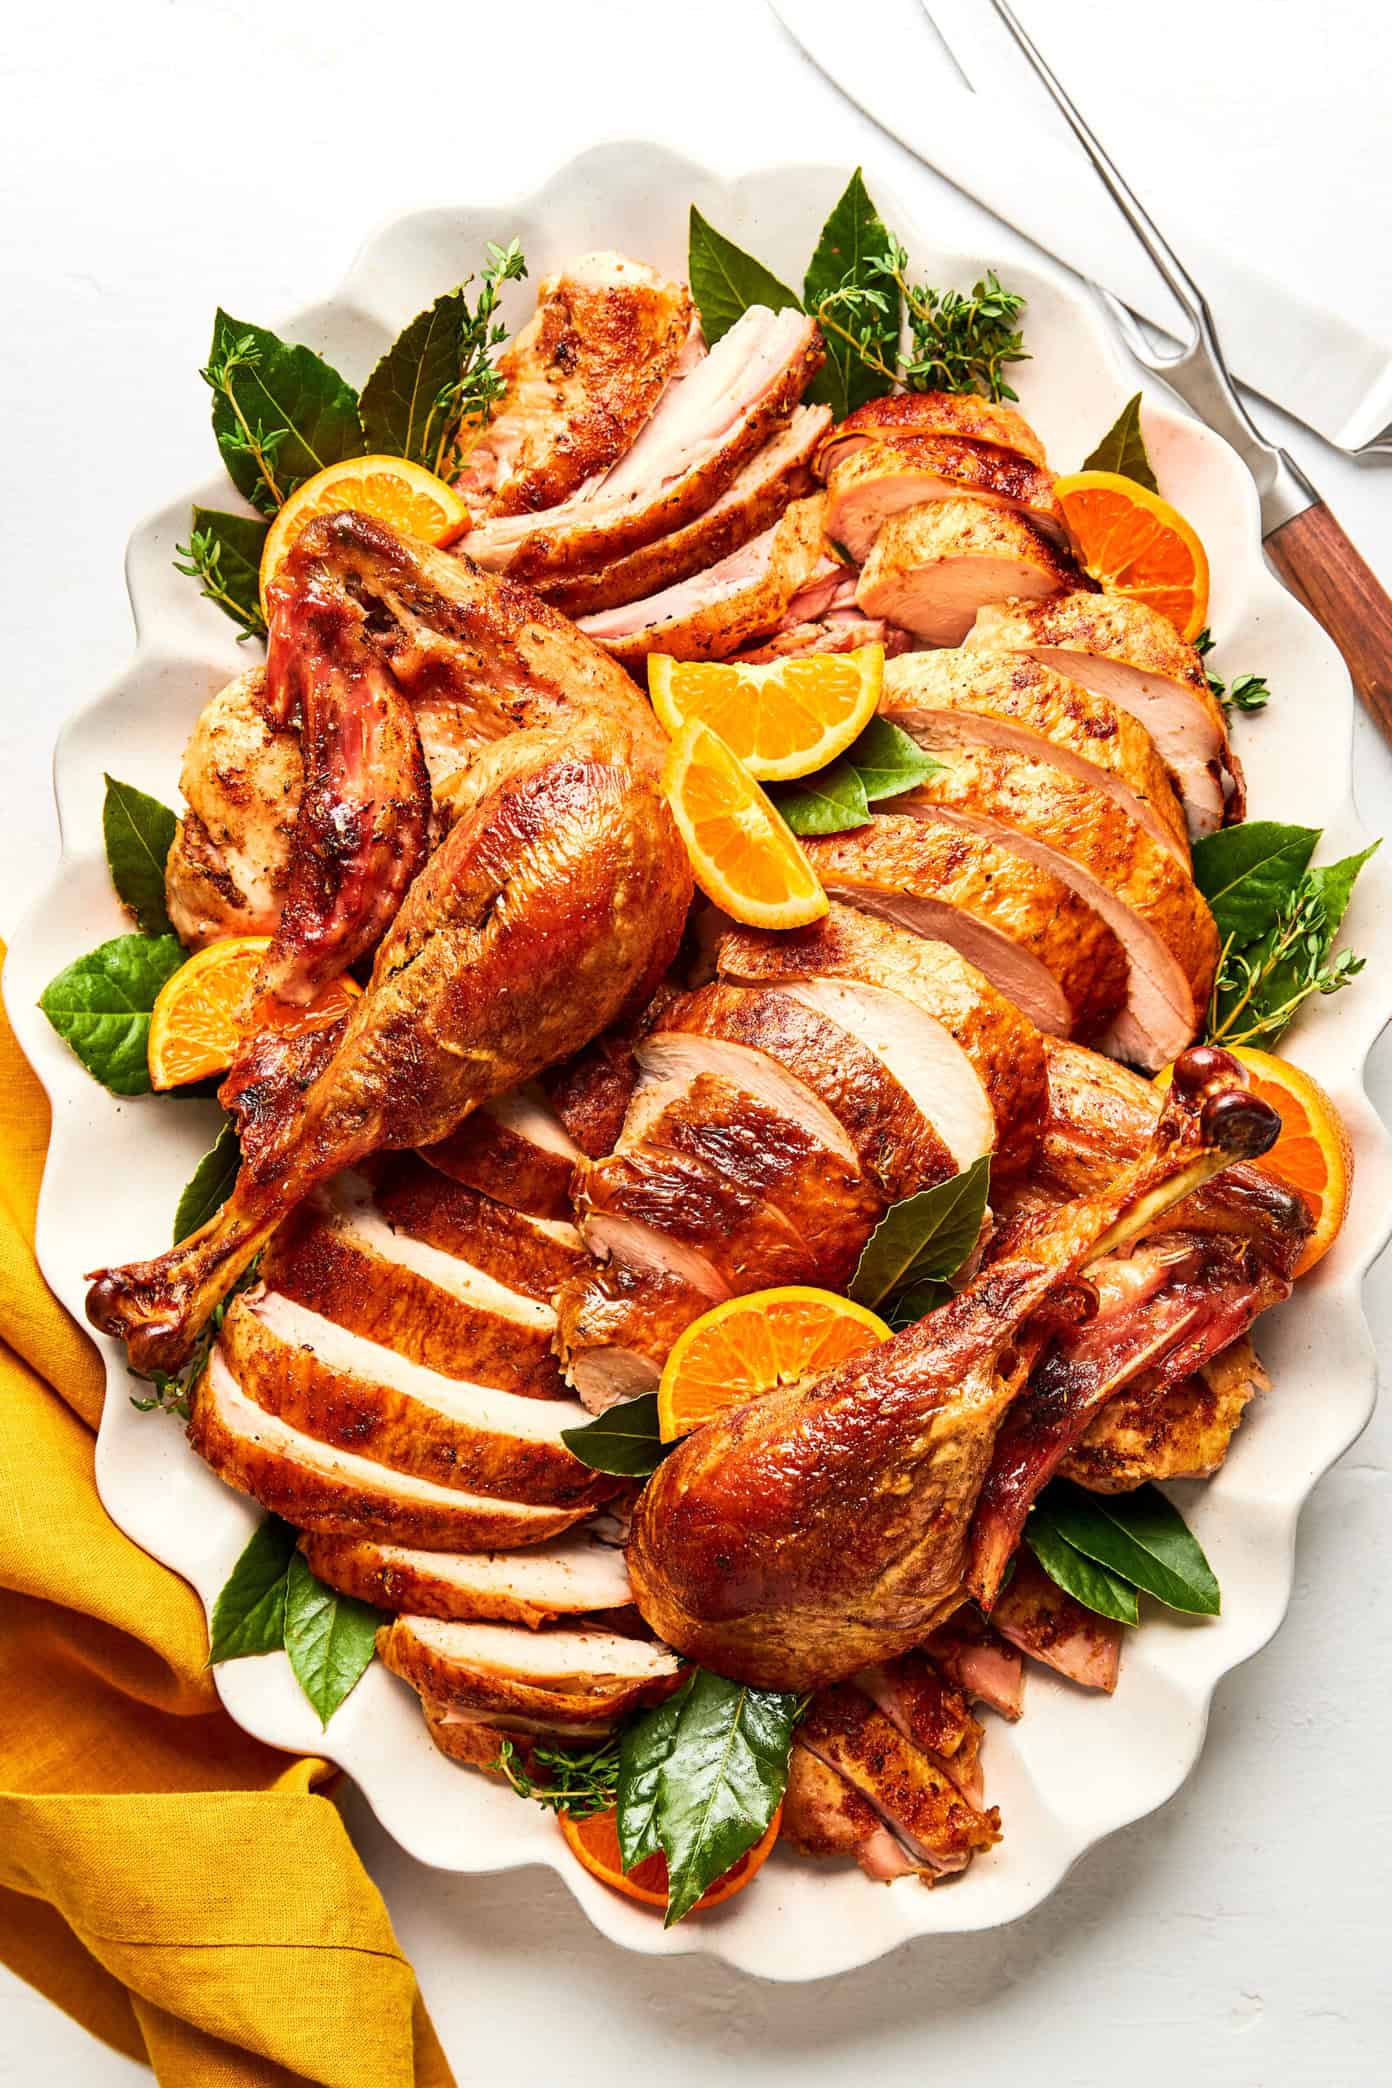
The Secret to a Perfectly Golden, Moist Dry Brined Turkey
Thanksgiving, Christmas, or any grand feast calls for a show-stopping centerpiece, and nothing quite compares to a perfectly roasted turkey. Yet, for many home cooks, achieving that elusive combination of golden, impossibly crisp skin and incredibly juicy, flavorful meat feels like a culinary Everest. Enter the dry brined turkey – a game-changing technique that promises to transform your holiday bird from merely good to absolutely unforgettable. Forget messy, cumbersome liquid brines that can sometimes alter the meat's texture; this method, inspired by culinary legends like Judy Rodgers of Zuni Café fame, simplifies the process while elevating results to an unprecedented level.
Why Dry Brining Reigns Supreme
If you've ever wrestled with a giant bucket of salty water, attempting to submerge a turkey without spilling it everywhere, you already know one major advantage of dry brining: it’s virtually mess-free. But the benefits extend far beyond convenience. A foolproof dry brine is the secret weapon for a truly magnificent bird, delivering a depth of flavor and texture that other methods simply can't match. It deeply seasons the meat from within, not just the surface, ensuring every bite is succulent and savory. Moreover, it actively works to dry out the turkey's skin, which is crucial for achieving that coveted, shattering crispness once roasted. No fuss, no basting, no complicated steps – just a simple rub, some chill time, and the oven does the rest.
Understanding the Magic: How Dry Brining Works
At its core, dry brining is a simple yet scientific process. You apply a generous amount of salt (often mixed with herbs and spices) directly to the turkey's skin and cavity. Initially, the salt draws moisture out of the turkey meat through osmosis. This moisture then mixes with the salt, creating a concentrated "brine" on the surface of the bird. Over time, this seasoned liquid is reabsorbed back into the muscle fibers. The salt molecules work their magic by breaking down some of the muscle proteins, which allows the meat to retain more moisture during cooking. This is what leads to that incredibly tender, juicy texture.
Additionally, the extended exposure to air in the refrigerator after salting plays a critical role in drying out the skin. This removal of surface moisture is paramount for achieving that desirable golden, crispy exterior. Without this step, the skin would steam rather than crisp, leaving you with a flabby, unappealing texture. This elegant technique, championed for its exceptional results with poultry, truly ensures your dry brined turkey will be the talk of the table.
Crafting Your Simple Dry Brine Mix
The beauty of a dry brine lies in its simplicity. The most essential ingredient is salt – ideally kosher salt, which has larger crystals that are easier to handle and measure consistently than fine table salt. Beyond that, the spice blend is entirely up to your preference. Here are some popular and delicious additions:
- Herbs: Dried rosemary, thyme, sage, marjoram
- Aromatics: Garlic powder, onion powder
- Spices: Black pepper, paprika (smoked or sweet), a pinch of cayenne for a subtle kick
- Citrus zest: Finely grated lemon or orange zest for brightness
A good starting ratio is about 1 tablespoon of kosher salt per 4-5 pounds of turkey. For a 12-15 pound bird, you'd typically use 3-4 tablespoons of salt mixed with 1-2 tablespoons of your chosen herbs and spices. Combine everything thoroughly in a small bowl, ensuring the salt is evenly distributed with the other flavors.
Your Step-by-Step Guide to a Flawless Dry Brined Turkey
Ready to experience the best turkey of your life? Follow these straightforward steps to prepare your easy and foolproof dry brined turkey.
Step 1: Prepare Your Turkey
- Thaw Completely: If your turkey is frozen, ensure it is fully thawed in the refrigerator. Allow approximately 24 hours for every 4-5 pounds of turkey.
- Remove Giblets: Take out the neck and giblet bag from both cavities (neck and main body). You can save these for gravy if desired.
- Pat Dry, Very Dry: This is a crucial step! Using paper towels, thoroughly pat the entire turkey, inside and out, until it is as dry as possible. Any surface moisture will hinder the brining process and prevent crispy skin.
Step 2: Apply the Dry Brine
- Season Generously: With clean hands, liberally rub your dry brine mix all over the turkey. Pay special attention to the breast, thighs, and legs. Gently lift the skin over the breast and rub some of the mixture directly onto the meat underneath – this ensures deep seasoning. Don't forget the inside of the cavity as well.
- Even Coverage: Aim for an even coating, but don't worry about measuring perfectly once you start applying. The goal is to cover all surfaces.
Step 3: The Essential Chill Time
- Refrigerate Uncovered: Place the seasoned turkey on a wire rack set over a baking sheet (to catch any drips). Transfer it to your refrigerator, uncovered. This exposure to air is vital for drying out the skin.
- Allow Two Days: For optimal results, allow at least 36-48 hours for the dry brine to work its magic. This extended period allows the salt to penetrate deeply and the skin to sufficiently dry. If time is short, a minimum of 24 hours will still yield excellent results, but two full days truly sets your turkey apart.
Step 4: Roasting to Perfection
- No Rinsing: Do NOT rinse the turkey before roasting. The salt will have been absorbed, and rinsing would reintroduce moisture, sabotaging your crispy skin efforts.
- Bring to Room Temp (Optional): For more even cooking, you can let the turkey sit at room temperature for about an hour before roasting.
- Roast Without Basting: Place the turkey in a preheated oven (commonly 425°F for the first 30 minutes, then reduced to 325-350°F for the remainder of the cooking time). No basting is required – the dry brine takes care of the moisture, and basting would only inhibit skin crisping.
- Monitor Temperature: The turkey is done when an instant-read thermometer inserted into the thickest part of the thigh (without touching bone) registers 165°F (74°C).
Step 5: Rest and Carve
- The Crucial Rest: Once the turkey reaches its target temperature, remove it from the oven and tent it loosely with foil. Let it rest for at least 20-30 minutes (for smaller birds) or up to 45-60 minutes (for larger birds). This resting period allows the juices to redistribute throughout the meat, ensuring every slice is incredibly moist.
- Carve with Confidence: After resting, carve your beautiful, juicy turkey following your preferred method.
Expert Tips for Your Best Dry Brined Turkey Yet
- Turkey Size Matters: Choose a turkey that comfortably fits in your roasting pan and oven. A good rule of thumb is 1.5 pounds per person to allow for leftovers.
- Timing is Everything: Plan your brining time carefully. Remember, the 2-day chill is key, so start your prep several days before your planned feast.
- Gravy from Drippings: Don't let those flavorful pan drippings go to waste! They are the perfect base for a rich, savory gravy. Simply deglaze the pan and whisk in some flour or cornstarch slurry for thickness.
- Use a Good Meat Thermometer: This is your best friend for perfectly cooked turkey. Relying solely on cooking time charts can lead to over or undercooked meat.
- Consider Compound Butter: For an extra layer of flavor and moisture, you can rub a seasoned compound butter (butter mixed with herbs like sage, thyme, and garlic) under and over the skin just before roasting. This complements the dry brine beautifully.
- Don't Be Afraid to Experiment: Once you've mastered the basic dry brine turkey technique, feel free to experiment with different spice blends to customize the flavor to your liking.
By adopting the simple, yet profound, technique of dry brining, you’re not just preparing a meal; you’re ensuring a truly memorable culinary experience. The result is consistently a turkey with glorious golden, crisp skin and succulent, deeply flavored meat that will impress even the most discerning palates. Say goodbye to culinary stress and hello to your most delicious holiday bird yet!
For more detailed insights into the scientific reasons behind this method's superiority, check out our article: Why Dry Brining Delivers the Best Flavorful, Tender Turkey. And for additional practical guidance, our comprehensive guide, Foolproof Dry Brine: The Secret to Juicy, Crisp Turkey, offers even more tips and tricks.
Embrace the dry brine, and prepare for rave reviews and a truly enjoyable holiday feast!
